Showing posts with label holidays. Show all posts

Tuesday, February 8, 2011

Let's Get Crafty With It | Valentine's Day Inspiration


Valentine's Day is only several days away and I've been finding so many fabulous ideas around the web from some of my most favorite blogs and craft sites! There are so many talented crafters out there that it blows my mind away. Just about every time I see something so clever and interesting, I think to myself, "Now I why didn't I think of that!" But, that is why the internet can be so wonderful in bringing all these amazingly talented people from all corners of the world, to share their creativity with others. I never can get enough of it and no matter how old I get, from as long as I can remember since I was a little girl, I absolutely get tickled with enthusiasm about anything crafty. There's this little girl inside of me that never grows old! Now that I am a parent with small children, their curiosity and playful spirit just ignites that creative passion even more...

Okay, so let me just keep this sweet and short! Here are some of my favorite Valentine's craft ideas, but let me tell you, there are tons of places I've found so far that have some great ideas. So although I can't list them all in this post, there will always be more for me to share. But for now, these are some really awesome places on the web for inspiration specifically for Valentine's Day :)


Chocolate Ravioli Hearts [www.HungryHappenings.com]


Valentine's Be Mine Banner [www.howdoesshe.com]
Valentine's Day Matchbook Cards [by eighteen25]


Photo Strip Hearts [by eighteen25]


Valentine's Fabric Heart Garland [by how about orange]


Valentine's Gum Ball Necklaces [by one charming party]


Other awesome craft sites:


post signature

Sunday, December 26, 2010

VIDEO: Christmas Stories :)

The other day, my friend Christine aka 'Listgirl', also fellow designer at Little Dreamer Designs, posted these Christmas videos on her blog and I thought they were very entertaining that I just had to share!! It's sort of a THEN and NOW rendition of the nativity story and the birth of Jesus. Enjoy!


post signature

Thursday, December 9, 2010

[DIY Holiday Project] Paper Christmas Tree

Today I have a little holiday craft project to share with you! This one is basically the same technique I used when I created my Christmas Wreath last year, using the same scrapbook paper collection--Sweet Dreams Holiday Avenue by My Mind's Eye. I just adore the glittery + textured feel and gorgeous colors + designs of these papers, but you can use any of your favorite scrapbook papers as you like. This project was inspired by a post I read here and here, from Crate Paper on their blog, but also because I wanted to create these trees to coordinate with the holiday wreath that I mentioned above.

Anyways, here are a few photos of what I did and the final result only took me a little over an hour, but could take longer depending on the size of your tree cone. I also had a lot of extra pre-cut and stapled papers from last year, so that really helped keep this project shorter than usual. Either way, be sure to take your time and have fun with it!

DIY: Paper Christmas Tree

Supplies Needed:
  • Craft or Foam Tree Cones
  • Patterned Cardstock cut into strips (sizes between 1" x 4" inch to 1" x 5" inch), then ends stapled together
  • Hot Glue Gun


 1. This step I already had these pre-cut and stapled from the previous year, but what it really is are 1" x 5" strips of patterned paper with ends stapled together.


 2. Using your hot glue gun, add a strip of glue to the stapled edges. Be careful because when pressing these down, it can be too hot too touch. Also, you will probably need to hold them down for 10-15 seconds at a time for it to really settle and stick.


 3. Begin adhering the strips to the cone about 1.5 to 2 inches above the bottom edge. Do this by overlapping the corners, just a little tiny bit, all around until you come full circle. After that, for each layer move up 1/2 to 3/4 an inch.


 4. This first layer makes it hard for the cone to stand steady on its own, so I slightly bended the strips to help the cone lay flat on the surface. You may do this to the rest of the strips, but I found that it didn't quite look right to me, so it's really your preference.


5. Once you reach the very top, the tip of the cone is left uncovered. What I did was punch out a circle of similar size or you can cut it out with scissors and glue that on. The glittered snowflake I used was actually an ornament off my tree. :) But, you can think up your own tree topper ideas such as a paper punched star or circle w/your monogram initials, a small pretty bow or what have you...

Saturday, November 27, 2010

Thanksgiving Remembered

The greatest part of Thanksgiving is when we learn to carry the attitude of gratitude in our hearts every single day...

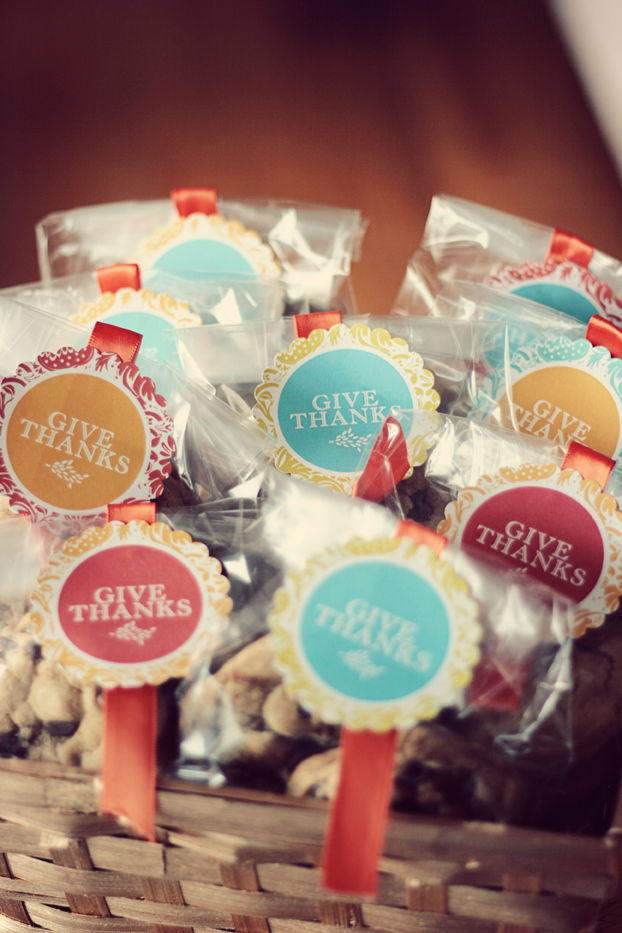
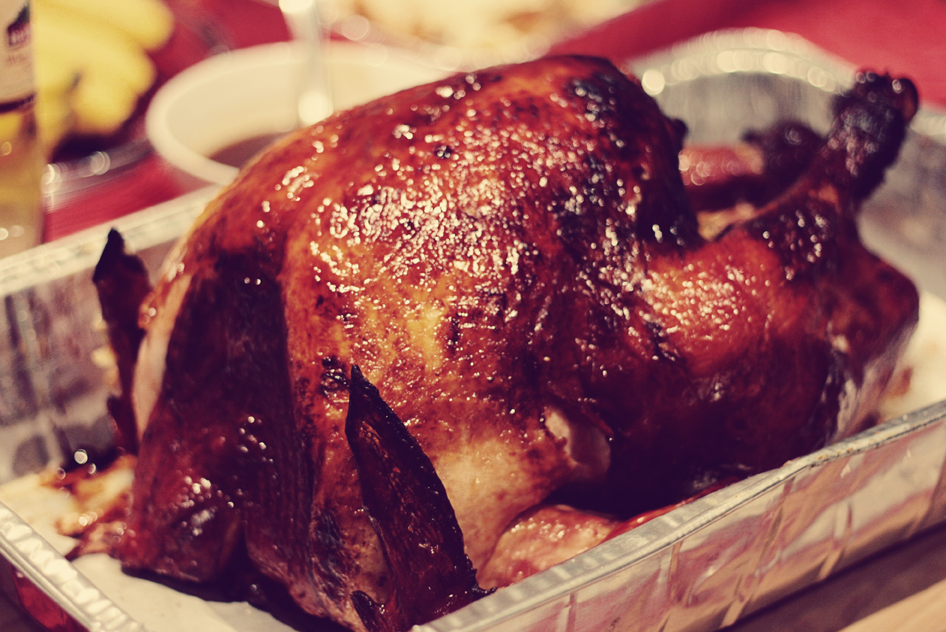
Just thought I'd share a little bit of the photos captured in memory of Thanksgiving 2010 :)


Credits: Used these beautiful free printables by Beth Proudfoot. 
Cookie recipe by Lovin' From the Oven.


this was THE best turkey ever! thanks to Alton Brown's [Good Eats Roast Turkey]


yummy sides: green salad, candied yams, and roasted veggies + [not shown: mashed potatoes, dressing, spinach dip]


 my sis + brother-in-law with their growing baby to be

my beautiful family

Yes, we all ended up so thankful by the end of the night as we were so blessed to spend quality time together, eating a huge delicious meal, and remembering all the wonderful things that we are fortunate to have. God has been very gracious to us all and we thank Him for the many blessing that He bestows upon our families and loved ones.

Now, we are anxiously looking forward to Christmas! Yay!


post signature

Wednesday, December 2, 2009

C2 | Paper Crave + DIY Paper Wreath

 Happy Wednesday!

Today I have a really awesome C2 | CREATIVE CONNECTION  to share with you... If you've been reading my blog up until now, you may already know that I have a thing for paper and all the creative things you can do with it. Not only do I love making cards or scrapbook pages, but I love making gifts or crafting with it to make art pieces or decor. There are tons of DIY craft sites that are incredible resources for making handmade items using paper. One valuable site does just that----PAPER CRAVE.

Paper Crave is a blogger site of all things paper from stationary to packaging design to paper crafts and printable resources, to gift wrap and greeting cards and so much more. I really like the new series installment that has just begun which is called the Weekly Wrap. Every Friday will feature unique gift wrapping and packaging ideas that will serve as inspiration for your own personal gift wrapping/packaging projects. SWEET, huh? Now is really a great time, before Christmas, to get inspired for this if you're looking for a new or fresh way of making your gift giving fun and unique.

I have a particular paper crafting project that I want to share. which was taken off Paper Crave's recent article a few weeks ago about Paper Wreath Tutorials. The article highlighted a few bloggers who shared their paper wreath making skills and the links to their blogs where you can find the step by step tutorials to create them. I was immediately taken by the looped paper wreath by Razzle Dazzle Crafting (another great craft blog) and decided to make one of these beauties. It was really easy, fun, and fast to make. Check out the photos below and see how wonderful it turned out.


 Stapled 1x5 inch strips of looped patterned paper.
Used Wonderful Winter glittered paper stack by My Mind's Eye.

 Using a hot glue gun, I then adhered the strips onto this 12 inch styrofoam wreath found at any local art/craft store.

 
 Close up photo of the layers of paper.

 
My handy dandy glue gun.:)

Ta da! Mission completed and it turned out beautiful!
( Thank you Dusty @ Razzle Dazzle Crafting! )

I have one more wreath to make, but thinking of creating three all together to add to my wall since a single one seems a little too small for the huge space. Plus, I'm definitely going to reuse them over and over again or even keep them up all year round just because they are too cute to put away. Maybe, it'll be one of those crafty decorative pieces that I can hang in my own personal craft room.... Yes, still dreaming of that day. :)

Anyways, hope you have a great rest of the day and thank you for checking in. Hope you were inspired! More updates on my digital designs and hybrid projects to come soon!

Be blessed!

Tuesday, November 24, 2009

DIY Wish Lists | Photos

 
Yes, I'm done! I didn't realize that it would take me a whole day to work on this, but I had the absolute best time just decorating the finished WISH LISTS. After printing them out, I thought it needed something extra and it led me to dig through my huge stash of supplies that I've collected over the years. I couldn't believe how much supplies I had at my disposal to work with and create so many things. I guess you can say, I've been the addictive type when it comes to scrapbook stuff, buying every cute and adorable thing there is at a craft store, but never wanting to use it for anything for the fact that I can't let go of such cool paper, stickers, punches, stamps, etc.... Well, I'm finally seeing that I can no longer live this way and my creativity is limited when I choose not to create and play and make beautiful things that I and/or others can enjoy... We only live once, right?

So, what I ended up doing was pasting my wish list onto colored cardstock, giving it that matted border around the edges, as well as giving the paper more support. Then I punched small holes at the top and added ribbon which can be used for hanging or pinning up on the wall. After that, I found some buttons, glittered felt, and beads to add a little dimension to it. Voila!  I especially loved the cute snowman. :)

The great thing about hybrid is that I can reuse the digital kit over and over again and print out different things to make with it, without having to repurchase everything all over again, like I would have to if this were all completely made with supplies bought at a craft store. See why I love this? :)

Next, I'm going to try making an advent/countdown calendar using Michelle Filo's ::Hybrid Magic No.15 Advent Christmas Calendar Template:: . Hope it turns out as good as this last project!


Thank you so much for stopping by! Tomorrow is Creative Connection Wednesday, so be sure to come back for more inspiration....

Cheers!

Monday, November 23, 2009

Fun DIY Holiday Projects

Hi there!
I want to apologize to those of you who came to check my blog last Friday to discover that there wasn't a freebie from me. :(  There's no other excuse except that I wasn't feeling my best. I think maybe my body was fighting against the flu and it's been quite a battle. A virus has been invading my household, off and on, for the past couple of months. So, I just couldn't get around to finishing up my free download which wasn't quite finished as I had expected it to be. Then, the weekend came around and I had to baby sit three nieces of mine for a night. Talk about pure exhaustion!

Anyways, I thought I'd share some creative inspiration that will hopefully get you inspired to create some fun, do-it-yourself, projects of your own this holiday season. I just love it when I see what our Creative Team (@ Little Dreamer Designs) manages to get done with products from the shoppe. Hybrid scrapbooking and crafting is something I have been wanting to do more of, especially now that I have a professional inkjet  printer (Canon Pixma Pro 9000) which has been calling my name to put it to good use, which I have, but only a few times for small projects here and there. Let me just say, you'll be seeing more of that coming from me in the near future.:)

So, here are some tidbits of Hybrid (DIY Crafts) from the Inspiration Gallery @ LDD. And if you go through this post, all the way to the end, you'll f ind a recent project that I've just finished and will be printing out. :)

Holiday Gift Card Wallet

by gingersnaps

2010 Hybrid Calendar
by soaring2him

Winter Wishes Hybrid Card
 
by supertwinkle

Christmas Tags
 
by PatriciaSartini

Muffin Treats
 
by lteather

Hybrid Gift Jar
 
by soaring2him

Christmas Countdown
 
by RuthsKris

And now for a peek at one of my first hybrid projects that has not yet been printed, but will be sometime tomorrow (photos coming soon). It's really nothing more than a typical layout, but because I need to print it and have it hung on my wall or fridge, then it becomes a hybrid project! :) Also, I need to give some copies of them to my sister who I hope will love them as much as I do...


These cuties are custom WISH LISTS for each of my boys and three of my adorable nieces, personalized with their individual head shots! HAHA! Aren't they super cute? :) I used Michelle Coleman's yummy HOLIDAY JINGLE MEGA KIT and CD Muckosky's  JELLYBEAN TOES ALPHABET STAMPS, all available @ Little Dreamer Designs.

Thanks for letting me share and hope you enjoyed some of these fabulous projects that will maybe get you thinking about making them for yourself or for someone special.

Stay tuned for actual photos of my printed WISH LISTS. :)